

5 Ways To Remove A Background with GIMP
A lot of new people to GIMP ask these two questions:
What is Gimp good for?
GIMP is an open-source photo editing software; it mimics Photoshop in its appearance and terminology and is free to use.
What is better: Gimp or Photoshop?
It depends on the type of user you are; Photoshop is a stronger image editing tool, yet, that doesn’t necessarily mean it’s the tool everybody needs to edit a photo.
For most casual users, GIMP is more than enough; it can get the job efficiently done without bearing yourself with loads of monthly subscription payments. you can check details gimp vs photoshop differences.
In this tutorial series, you will learn the amazing features of this free software and how to use them. In this lesson, we’ll start to show you 5 different ways to remove the background of your photos using the tools of GIMP.
Open your image
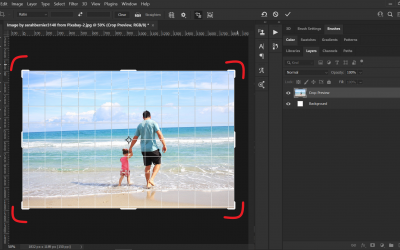
Before using any tool, you’ll need to open your image file in GIMP, first click on File at the left corner of your screen, choose Open, and then choose the image file you need to edit. Or press Ctrl+O as a shortcut on your keyboard to open your image directly.
If your image doesn’t fit the window, simply go to View on the top bar, hover your mouse over Zoom to open the options included in it, and select Fit Image in Window.
After having your image opened on GIMP, let’s use the first tool to remove your photo background.

The first way- The Fuzzy Selection Tool
1. Before selecting the tool go to the image layer and right-click on it. Choose Add Alpha Channel to have a transparent background after you remove it from the photo.
2. Now select the Fuzzy Selection Tool from your toolbox and start selecting your photo background by clicking on it.
3. Press Delete on your keyboard to remove the selected background.
4. After deleting your background, use the Eraser tool to delete any unwanted remaining pieces for a clean, transparent background.
5. If you want to fill your background color, press on the New layer icon down in the layers palette, select the Bucket fill tool to fill the new layer with the color you want and then move the layer down the main image layer to appear from behind it.


Second Way- The Free Selection Tool
1- After opening your image, select the Free Selection Tool, zoom your image, and start drawing a selection line around the edges of your main subject. While selecting your subject, press Backspace for any mistakes occur and redraw it again (the Ctrl+Z will not work during this process).
2- After selecting your subject, go to the top bar, click on Select, and choose Invert to reverse the selection to the background instead of your main subject.
3- Press Delete on your keyboard to have the background removed. Notice that this tool is more accurate in removing your background than the Fuzzy Selection Tool.


Third Way- The Quick Mask
1- Open your image and click on Select on the top bar to choose Toggle Quick Mask
2- Notice your photo will turn into a red overlay color by the masking effect.
3- Now select the Eraser tool and start to erase the mask (the red color) from over your main subject.
4- After erasing the mask from the main subject press Shift+Q to select your image.
5- Now open the Select slider and select Invert or simply press Ctrl+I to select your background.
6- press Delete on your keyboard to remove the background.


Forth Way- The Layer Mask
1- After having your photo on GIMP, right-click on the main Image layer in the layers palette and choose Add Layer Mask and notice the layer mask added just next to it. more details about the layer mask here.
2- Now select the Brush tool from the Toolbox, make sure the foreground color is black, and start to paint around your main subject to remove your image’s background. Probably it’s the shortest way to do it.


Fifth Way- The Alpha Channel Mask
1- Open your Image and go to the main image layer. Right-click it and select Add Alpha Channel.
2- Duplicate your layer by pressing the Duplicate icon down on the layer palette.
3- Go to the top bar and slide the Colors options, and select Curves.
4- Make sure your Channel is on Value, your Curve type is Smooth, and your Preview box is checked.
5- Now, start moving the curve line to contrast the main subject color to the background color.
6- Now, go to Colors on the top bar again and select Desaturate to turn your image into black & white.
7- From the three options you have (Brightness, Luminosity, and Average) choose the one that provides you with the best separation in whiteness between the main subject and the background (the background must be whiter than the main subject).
8- Go to Color again and select Invert to select your background.
9- Select the Paint Brush tool, make sure your foreground color is black, and start painting on the remained white areas of the background until you cover it all in black to include it into the mask. You can control the brush size using (brackets ] [) on your keyboard.
10- After covering your background in black, change your brush’s foreground color to white and start painting over your main subject in white to deselect it out of the mask.
11- Now, add a layer mask to the second layer by right-clicking it and select Add Layer Mask.
12- Select the White (full opacity) option.
13- Now select the masked layer and copy it through Edit.
14- Go to the second layer again and double click the layer mask then press Ok.
15- Now paste the copied layer through the Edit option and select the floating layer.
16- click on the Anchor icon down on the layer palette to add a mask.
17- Now, delete the making layer we have been working on to remove the background, as shown in the image.
18- To change the background color, add a layer under the main layer you have and fill it with a solid color of your choice.


Conclusion
GIMP provides you with a collection of different tools that can be used in background removal. Each tool may not provide you with the same level of accuracy; still, it depends on the effort and time you put in it to get accurate, clean results. After all, it’s a matter of personal preference (depending on your use) to choose the way that suits you and your image.
FREE TRIAL! TRY IT NOW FROM CLIPPING PATH ASIA
SIGN UP AND GET A FREE TRIAL
0 Comments