While advances in technology mean that our mobile devices are capable of taking incredible photos, there are enormous differences between a selfie and a headshot.
A headshot is supposed to be a professional representation of yourself: an image that you would proudly use on your corporate or business website; social media platforms and other assets to help sell your brand and business identity.
No matter how well you think you can ‘selfie’, or how good you might think your selfie stick plays the part, you are never going to achieve that professional result by reversing the lens on your phone and simply tapping your screen – trust us.
There are many layers to a professional headshot; it’s a fine art to get the right image that correctly displays your brand identity and can be used as the face of your company. So pop down the selfie stick and follow our guide to getting the best possible corporate headshot.
What is considered a headshot?
These are semi-close up photos used by the corporate world, including professionals of all walks of life. These days, they’re also widely prominent in resumes, portfolios, on websites and social media platforms like LinkedIn. You’ll find them in marketing, recruitment, promotional campaigns and in general as a way to put a human face to a company or brand.
What makes a good headshot?
A professional set of equipment is required for a great snap, and a mobile device is not quite going to cut it. Smartphones are designed to do many things, including taking photos, in a condensed device that is designed to fit in your pocket. Still, a professional headshot needs a studio or particular set up to get all the elements necessary.
Most of these kinds of images are shot with a neutral background and specialised lighting, all of which is arranged and designed to make you the focus of the image. A photographer will also frame your body correctly, ensuring your hair and makeup is reflected well and that your smile ties it all together.
Lighting and composition are essential elements in professional shots like this – something of which is often left out in the good, old selfie.
Why editing is a must
Getting the lighting 100 percent right for a headshot can be extremely challenging, even for the most accomplished photographers out there. Many of these issues are cleaned up in the editing process.
Quality editing can enhance lines, remove shadows, bring other objects in and out of focus and create a clean, sharp and highly professional image. If there are bits and pieces out of place, experts can tidy up any imperfections that need ironing out. However, as this process is exceptionally finicky, we always recommend using headshot retouching services to complete this part of the journey.
If you’re not sure where to start, we recommend speaking with our friendly team on the best options for your needs, and any considerations you might need to keep in mind for your headshot photography.
Masking in Photoshop is one of the most critical functions available, as it allows you total control over each layer.
While there are features that can change the entire surface of a layer (opacity, etc.), this particular option will impact the whole element. Masking gives you more precise control and allows you to have different settings on different parts of your layer.
What is Photoshop masking?
Essentially, a mask is when parts of an image have pixel intensity values of zero, and others have values of non-zero. This renders parts of the image effectively invisible so that you can apply different effects on certain parts of the layer, rather than the entirety of it. This allows for much greater finetuning, which inevitably makes it a highly useful tool for a designer.
What’s the difference between layer masks and clipping masks?
There are two different kinds of masking: layer and clipping masks. While they both effectively perform the same function, the application is very different.
You can change the transparency of an image with a layer mask in Photoshop that uses monochromatic colours. If the mask is set to white, it is 100 per cent visible. If it is set to black, it is 100 percent invisible. You use the greyscale colours in between to set the transparency.
Using these features lets you control the visibility, providing designers with a flexible tool that’s far more practical than the eraser. Moreover, it’s a safer option to make use of, given once part of your image has been erased, it is gone forever (oops).
Clipping masks involve a similar process, but they don’t use the monochromatic grayscale colour range – which we will explain further.
Creating a clipping mask in Photoshop
Instead of using monochromatic grayscale, a clipping mask will use the transparency of the layer beneath. This is useful when you want to use a different colour and texture on your existing layer – for example, in writing.
You could use a layer of fire and place the writing ‘fire’ on top of it. By using a clipping mask, you can make the letters in the word fire have the same flamelike appearance.
How to edit your layer mask
It is a relatively simple process to edit your layer mask. Just follow these simple steps to achieve the result you desire:
Choose the layer that has the mask that you want to edit from the ‘Layers’ panel in Photoshop.
The ‘Mask’ thumbnail will be visible in the ‘Layers’ panel. Select this.
You can choose any of the editing or painting tools, with the foreground and background colours assuming grayscale values.
If you want to make the layer more transparent, paint the mask with white. For partial visibility, paint it grey. And if you want to hide it completely, paint the mask black.
It is also possible to edit the layer instead of the mask if you prefer. Just select that particular thumbnail in the ‘Layers’ panel and a border will appear.Need a hand? Trust the team at Clipping Path to do all the hard work for you. We make editing your images easy, with all the finer details taken care of from start to finish.
Hello, Dear Industry colleagues! we have been suffering from bad customers since 2012. as they get the job done by us but not making any payment or communication. below are the company or individual not paid after job done. So be aware of them.
You make comments about your bad customers. So we will add the list. I hope it will help our industry to not lose time & money.
Sinnema Consultancy
Jitze Sinnema
Wagenaarstraat 379
1093CN Amsterdam
Netherlands
jitze.sinnema@gmail.com
Midtgaard Group
Henrik Midtgaard
Lille friheden 2, 1F
2650 Hvidovre
Denmark
henrik6200@msn.com
Advertising and Media Company
Aegis MENA
12 Floor Al Shorouq Tower,
Jaber Al Ahmed St. Sharq
KUWAIT
+965 22282366
ginag@aegismena.com
Chokogaver ApS
Michael Bæk Simonsen
Industrivej 27A
7080 Børkop
Denmark
mbs@maxmedia.dk
B. Rasche e.K.
Tino Schlosser
Lindenstr. 21
16230 Melchow
Germany
info@rs-werkzeuge.de
Dojo Photo
Greg Wilson
Canada
squeeloockle@yahoo.ca
Niclas Hechmann Photography / NHP
Niclas Hechmann
Retortvej 58, 3sal.
2500 Valby
Denmark
mail@niclashechmann.com
Neo Photography
Lance Worthington
Riverside Studios
2a Queens Road Sheffield S2 4DG
United Kingdom
0114 2720206
lance@neophotography.co.uk
Jas Bhachu
18 Henry Street
Liverpool L1 5FS
United Kingdom
j_bhachu_20@hotmail.com
NewWave
Moe Shehadeh
5353 E 2nd st
Long Beach ca 90803
5626210720.
newwave00@gmail.com
Wildcard Digital
jason stevens
Ft. Lauderdale Florida
United States
jason@wildcarddigital.com
FotoGraffi Agency Limited
83 Ducie Street, Manchester
M1 2JQ
United Kingdom
(44) 0844 807 4671
accounts@fotograffi.agency
Go Entertainment Group Ltd
Darren Roberts
Broadley House,48 Broadley Terrace
London NW1 6LG
United Kingdom
darren@goentertain.tv
Snaply Naehkram
Simon Hoennebeck e.K.
Freisinger Str. 22
84072 Au i.d. Hallertau
Germany
+49 8752 869675
simon@snaply.de
DVE MEDIA PRESS
Dirk Van Elslande
Boomsesteenweg 49A unit 13
2610 Antwerpen (Wilrijk)
Belgium
+3232906407
dve-media@proximus.be
Dr Zak’s Ltd
Tom Dow
Unit 3 Sterling Court Sterling Way
Borehamwood Herts WD6 2BT
United Kingdom
+44 (0)333 023 7874
tom@dr-zaks.com
Simon apel
simon apel
77 morton st
brooklyn ny 11249
United States
347-861-1927
apela128@gmail.com
Eric Jimenez Photography
Eric Jimenez
Edinburg, Texas
United States
erikjimenez.photo@gmail.com
LK Fashion Trade SAS
Laurent Kopp
34 Rue Jean Jacques Moerlen
67140 BARR
France
contact@boxerbox.fr
Elanthi Tharmakulasingam
Röntgenvägen 1 lgh 2319
141 52 Huddinge,
Sweden
elanthifoto@gmail.com
TPS Creative UK
THOMAS SADDINGTON (Tom)
Owner | Photographic & Retouching at TPSCreative.co.Uk
Phone : +44 7941 905086
tom@tpscreative.co.uk
www.tpscreative.co.uk
RICARDA Fashion
Brenda Loecke
399 Hay Street Subiaco
6008 Western
Australia
+61 (8) 9381 5446
brenda@ricarda.com.au
EFFECT REKLAMBYRÅ
Tommy Melvinson
Falkängsgatan
598 22 Vimmerby
Sweden
tommy@effectreklam.se
Weiland Design & Druck
Thomas Weiland
Stich 76
52249 Eschweiler
Germany
mail@thomas-weiland.com
PixelSkalpell
Torsten Wittelsbacher
T8 Maple Avenue, Stillorgan/Sandyford Industrial Estate
All you are trying to capture the best moments of life form photographs. Whenever we have a glimpse of these pictures, it brings a smile on our faces. But as time passes, the image loses its luster, and the paper tends to degrade, or it may tear away at some point in time.
Photo editing is an art that brings back the originality and vigor and, consequently, the emotions with the picture. Photo editing services involve:
Photo Restoration: is a process of retaining the original picture from damaged photographs that are faded due to marks, dust, stains, and several scratches. It is the process of adjusting the color, sharpness, and brightness levels with the removal and repairing of missing and damaged areas.
Now an old family photograph can turn into a great picture without damaging the original’s contents of the photo.
Photo Enhancement: is another photo editing process that can be used for a complete remodeling of the photograph by editing some details of the photos. The editing of the pictures includes the alteration of faces, skins, objects, products, etc.
That is a process required by the photographs which are dull, damaged or of poor quality. This service is mainly employed for Modeling companies, publishing or printing, and the jewelry industry. Nearly all of the published photos or the professional model portfolios are formally enhanced. Photo enhancing service involves:
– Improving the sharpness of the image
–Removal of unwanted objects
Photo Retouching: is a process that is widely used by nearly all of the leading professional photographers. This technique adds a great professional look to your original photo. The retouching of the photograph gives a portrait effect to your picture, and also several other features can also be added to the image such as:
One can add even the motion effect to your image, but it requires specific software’s and this task should be handled by the professionals only.
Vector Conversion: is a process of remodeling the faded and blurred photographs into the hand-drawn vector photo. This service can convert any logo, artwork, badges, maps, stencils, crests, cartoons to hand-drawn vector images. That is the technique that can be used for printing the raster, bitmap or hand drew pictures on the prints or the advertisements.
Clipping path: is a vector path that permits the part of the picture to display while neglecting the rest. This service is more like an image editing program, which is functionally equivalent to a mask.
Are You Looking Fast, Reliable and Low-Cost Images Editing Service Provider for your online business?
Then you have found a new home! It’s Clipping Path Asia! Delve our services are first-rate quality as well as industry-leading.
Our in-house professionals have their expertise; Photoshop and InDesign, we have the people that are best fit to do the job for you.Want to see the quality of our work?There many examples online at here Sample images.
We provide free trials for all our photo editing services
Clipping Path Asiacan be theproduct photo editing company where you can send all the images you want to edit, any time of the day, from any part of the world. No matter where you are right now and no matter what time it is, our photo editing experts provide the service you are looking for; pleasant, fast, hassle-free, and with excellent output.
The answer is simple. We deliver high-quality work with quick turnaround times at the lowest prices. Our in-house experts are highly skilled, particularly when it comes to photo processing. As a result, they always get it right the first time.
We agree when you say a photo is worth a thousand words but truth be told; it’s worth much more because a photo can tell all that words could tell and even much more. If what you’re interested in…
Clippingpathasia.com recognizes that photos are indeed an immortalized version of different moments of our lives handed to us in a piece of paper or a graphic file. However, no matter how…
That makes the image more focused on the desired element and so demonstrating the meaning of the picture more appropriately. Make Background Transparent…..
While a first editor would merely detach the canvas as well as replace it, a specialist could do one thing further. He could use associate degree alteration layer or else…..
Just like several another area of life, the growth of technology and newest trends in the globe of photography has altered from physical to digital. In the precedent, diverse apparatuses were…..
✔ Adobe Photoshop image manipulation servicesLighting specialist, manipulate shadow to strengthen the cars lines as well as enhance its curve. The whole sight is melodic group to create the final word insight of the car. But, once the snap shoot….
At times several courses are created to disguise the unwanted portions of a picture. Diverse courses are laid out for each the picture in addition to the sketch for graphic……
Mainly the produce companies for their advertising purpose use these services. ad is one of the most significant aspects throughout which advertising and sales industry grow further….
The memories of high-quality old days are still bright in my mind, while photographs had not anything to perform with the computer. Now, photographs are captured with digital cameras…
All you require to try as well as do is create a substitute path by persecution the pen tool to specify the popular object. Albeit, it is straight forward to execute this method, though, it’s prudent…..
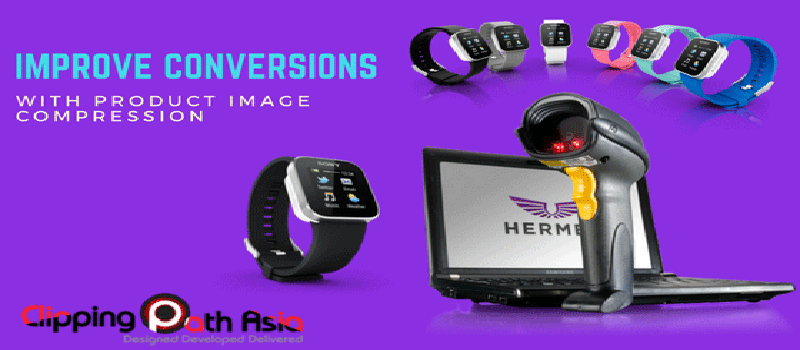
A website with a lot of traffic but in which there are no conversions is like a shopping center full of people where nobody buys! In other words, it is not enough to occupy the first page of the search engines or to make a perfect marketing and communication campaign. It is necessary that all that traffic we capture converts to sales or calls to action. so you have to care about how to improve conversions. checkout the best way to edit product images?
The web structure, design, and marketing strategy should be aimed at achieving our conversion objectives. In this article, we will see what conversions are and how we can optimize them with product image compression and other means.
What is a conversion?
Conversion is the achievement of the goal we have set for our e-commerce website. Conversion is the holy grail of landing pages. There are countless factors that determine your conversion rate: a persuasive call to action, a form that pushes to be filled, an attractive content and a modern and simple design.
Optimizing a landing page is, therefore, one of the keys to maximizing the return on investment (ROI) of the campaign or improve the usability of the page, which will end up increasing your potential customers in an effective way.
Conversion is the second phase of inbound marketing strategies. It consists of getting the visitors to your website to perform an action that you have defined according to your objectives.
A conversion occurs when the user who visits stops being anonymous. He becomes a sales lead if we use marketing terms. Here, he is one step closer to being a customer.
The actions are different according to the type of site. An e-commerce site seeks to achieve more sales while a blog seeks to increase subscriptions or download content. The objectives can be very varied. It depends on what you raised when you designed the strategy.
Image compression as a way of speeding upload page and conversion rate
Even in the age of the fast internet, reducing data plays a big role in ensuring users continue surfing, heed calls to action and get to the landing page in the case of e-commerce.
Let’s say you have three pages with 3 megabytes file size on each page of your website, the visitor first has to download this file set before the page is completely displayed.
The lesser, the file size, the better the experience for the user. The more the file size, the more the experience may seem frustrating. The visitor is likely to leave your page very quickly because he does not want to wait for the pictures to download.
In addition, the Google search engine recognizes the extent to which images are compressed and rates too large file sizes very low. Hence, image compression is a great way to reduce page load times.
We’d like to give you some tips on how to compress your pictures easily and without complications so that your potential customers do not get frustrated with the load speed of your website.
The formula is: the smaller the image file and the smaller the amount of data, the faster the loading speed. This, thus, leads to the better user experience for the visitors and improved search engine ranking.
Basically, when integrating an image into a web page, you have to get to know and understand these three things: file format, image size, and file size.
Which image format is best for a web page?
There are countless file formats for pictures. For use in a website, we only have to deal with these four different file formats: JPG/JPEG, PNG, SVG, and GIF. There are several other image file formats, but these are the most used on the web
JPG: The .jpg or .jpeg (Joint Photographic Experts Group) is probably the best-known file format in our opinion. It is used in digital cameras, on websites and even in professional print files. It has the great advantage of being able to compress most of the image motifs. Image compression means when the file size is substantially reduced, resulting in shorter load times.
As a rule in ensuring this, the .jpg format should be your first choice. Alone, for this reason, this format is the most commonly used file format. Besides, almost all the pictures you want to include on your website will probably already be in .jpg format.
PNG: The .png (Portable Network Graphic) is a “newer” file format than the .jpg. As the name implies, it has been largely intended for use on the Internet. However, the compression process is technically different.
It mainly reduces the number of colors used in the picture. With this format, the more the image is compressed, the smaller the file size and lessen the number of colors used. This has the disadvantage of giving conventional images an unnatural look.
GIF: This is a very old picture format. The .gif (Graphics Interchange Format) has a big advantage over the two competitors: it can be animated. The disadvantage of the gif, however, is that it consists of only 256 colors. This is often not enough for pictures that are supposed to be natural.
SVG: This is an optimal choice for professionals. The .svg (Scalable Vector Graphics) is the latest file format in our list. It can be animated, easily compressed without data loss, inserted in XML code and even changed. SVG graphics are particularly suitable for websites that adapt to the device used. Due to the small file size, smartphone users with low bandwidth do not have to wait long.
An analysis of the above
For detailed images with many colors, the .jpg format is still the first choice as the emphasis is placed on color retention during compression. The .gif has been largely replaced by png. Only if a.
png file would be too large or for animations, the gif is preferred. The .svg format is not widespread so far but the potential is there: it impresses with small file sizes and scalability. This is becoming increasingly important for the growing number of different mobile devices.
Conclusively on image formats for a fast load speed of your website, we recommend you to use .jpg images as these cause the least problems and are easy to use.
How big should an image be for a website?
For this, one must know how the size of an image is measured at all. The unit of measurement is called pixels. Before you include an image in a web page, you should consider how much you want to view the image.
Keep in mind that the content area (the area in which the actual contents of a web page stand) on a PC monitor is typically around 1,000 pixels wide. From this, it can be seen very clearly how big pictures have to be in size.
Even captured images from digital cameras are often several thousand pixels in size. These image formats must be reduced. However, many cameras now have a special web format.
The following mistakes are often made when uploading images: an image is uploaded in the original size of, for example, 3500 × 2800 pixels, and then re-edited in the content of the website to a size of 600 × 400 pixels. The large original image is thus displayed reduced in size and may lead to poor image presentation as the image motif may look hard or overshadowed.
how to improve conversions With Other techniques
To increase the conversion rate, you must know how to persuade the user. You should apply techniques that do not let your visitors leave your site without completing the action. You have to understand their behavior, what they are looking for, offer something in return and earn their trust.
The following are some practices and techniques that you should apply to achieve more conversions:
Calls to action: They are a simple and convincing message used to persuade the user to complete an action.
Subscription forms: With this tool, you will get the contact details of the visitors which you can use to communicate with them.
Landing Page: The landing page is where users get directed to after they might have addressed the call to action. From the landing page, they can then fill in the form that you have prepared.
Build customer trust: You can convey confidence on your e-commerce website with the “open book” mentality. This could be in the form of including testimonials from satisfied customers. Let your contact information always be visible and include sections such as “About us” and “Portfolio”.
Get feedback from your visitors: Conducting surveys between users and non-users will let you know what improvements your website needs.
Optimize the purchase process: You should offer different payment method alternatives. Make clear information about prices, return policy, shipping, etc.
Tools to increase the conversion rate on your website
So far, we have reviewed the practices to increase conversion. Based on them, we will show you some tools to improve the conversion ratio. With these tools, you can reach your goal easily.
To create calls to action
Da Button Factory: This is a simple and practical button generator to create calls to action. It is a quick and easy-to-use tool. You can start from scratch or edit any of the examples that are in the gallery of the site. Once you have created the button, you can download the image to your computer or copy the code to insert it in your site.
Button Optimizer: This also among the popular tools used in creating buttons and grow website traffic. Like the previous one, this is free and easy to use.
With this, you can choose between different shapes, colors, edge details and text styles. You can download it in PNG format insert the button on your website with the HTML or CCS codes.
SumoMe: If you want to get subscribers without diverting visitors to a landing page, this plugin will help you. It allows you to include a lead generation bar in which the user leaves his mail and continues where he is.
But in addition to the banner, you can also create conventional buttons and pop-up windows. It has tools with which you can analyze your site’s conversion rate.
It is a very complete application in which you can have very useful tools for your website. For example, it features heat maps with which you can monitor visits to your website in real time.
Exersion: If you have heard about pop-up before exit, you know that it is a message that appears just before a user leaves the website. It is the last resort that tells the visitor why he should continue on the site.
Exersion is a tool with which you can create these types of pop-up windows. With this tool, you can give offers or invite him to see the content of interest so that he does not leave.
For forms and landing pages
InstaPage: This tool is one of the best tools for landing pages. It allows you to create landing pages in a simple way. It has available more than 70 templates that you can use as a starting point. Thanks to its drag and drop system, it will be very simple to customize your landing page.
One of its advantages is that it does not require you to have programming knowledge to create your page. In addition, it is integrable to MailChimp or Google Analytics. In it, you can perform A/B tests so as to test which version of the page generates the most conversions.
Formstack: This is a very intuitive tool that allows you to create registration forms in a few minutes. In their presentation, they guarantee to have several levels of security, an important feature when requesting data from your users.
In addition to the forms, you can also design personalized surveys. To use Formstack, you must join any of your paid plans. However, you have two free trial months in which you can decide if you should continue with the service.
Optimizely: Do you need to apply A/B tests to your forms or landing pages? With the help of this tool, you can compare two or more versions to determine which works best, according to your objectives. In this case, we are also talking about a payment application.
Options for multiple functions
Visual Website Optimizer: Visual Website Optimizer is one of the many e-commerce tools with multiple functions, which positions it as one of the most complete. Among its applications is the possibility of obtaining a heatmap (heatmap) and click maps to track the clicks of visitors.
You can also perform usability tests, split testing, A / B test, among others. Its trial version allows it to be used in sites that have less than a thousand visits during a month.
Feng-Gui: This application imitates the human eye. It analyzes the visual elements on your website and then identifies the most attractive components in the image, such as the display order, the areas of greatest interest, etc.
You ask why it will help you? Knowing this data, it is possible to create more effective strategies, improving the visibility of the site. With it, you will know when the visual elements fail and where to place the calls to action to be more effective.
Inspectlet: With this tool, you can identify users individually and see how they interact with your website. What Inspectlet does is record a video with all the movements of your visitors.This way you can see where you can click, scroll and mouse movements. You can choose between seeing the session of new visitors or those who have returned.
Take advantage of this tool
Go to Webinar: The content adapted to each phase of inbound marketing is essential if you want to learn how to increase the conversion rate. In this case, webinars, e-books, online courses, among others are very effective, because they promise valuable information to the user.
Go to Webinar is one of the most popular platforms to offer online conferences. Among its features include being able to manage attendees, record seminars, follow up by email, among others. It is simple to use and will work for you whether you have a large audience or a small audience.
Last line
Planning and implementing an online marketing strategy requires a lot of attention. These are just some of the many tools to increase the conversion rate on your website that you can use. Some free, others, paid for. Use them according to your needs to optimize resources.
Don’t forget the image compression practices and how it is one of the greatest determinants in how your page ranks and how your site visits are converted to sales and responses.
We agree when you say a photo is worth a thousand words but truth be told; it’s worth much more because a photo can tell all that words could tell and even much more. If what you’re interested in…
Clippingpathasia.com recognizes that photos are indeed an immortalized version of different moments of our lives handed to us in a piece of paper or a graphic file. However, no matter how…
That makes the image more focused on the desired element and so demonstrating the meaning of the picture more appropriately. Make Background Transparent…..
While a first editor would merely detach the canvas as well as replace it, a specialist could do one thing further. He could use associate degree alteration layer or else…..
Just like several another area of life, the growth of technology and newest trends in the globe of photography has altered from physical to digital. In the precedent, diverse apparatuses were…..
✔ Adobe Photoshop image manipulation servicesLighting specialist, manipulate shadow to strengthen the cars lines as well as enhance its curve. The whole sight is melodic group to create the final word insight of the car. But, once the snap shoot….
At times several courses are created to disguise the unwanted portions of a picture. Diverse courses are laid out for each the picture in addition to the sketch for graphic……
Mainly the produce companies for their advertising purpose use these services. ad is one of the most significant aspects throughout which advertising and sales industry grow further….
The memories of high-quality old days are still bright in my mind, while photographs had not anything to perform with the computer. Now, photographs are captured with digital cameras…
All you require to try as well as do is create a substitute path by persecution the pen tool to specify the popular object. Albeit, it is straight forward to execute this method, though, it’s prudent…..
A world without digital technology is hardly conceivable today. What would we do in everyday life without a tablet, smartphone & Co.? In particular, the smartphone is developing more and more into an all-in-one device.
According to statistics, the smartphone displaces not only electronic devices such as the mp3 player and the navigation device, but the sales of digital cameras also went down between by about 50% between 2007 and 2014. Even professionals have firmly integrated the smartphone in their everyday life.
You will be surprised by the quality of images taken from your smartphone with our simple tips and tricks that will help you use the camera on your smartphone.
Smartphone photography for e-commerce
Smartphone photography is on everyone’s lips. And it is gradually, but unsurprisingly, featuring in e-commerce too.
Before considering spending on a digital single-lens reflex (DSLR) camera for product photography, why not consider using the high-resolution camera of your smartphone which you carry everywhere? That may sound crazy and a bit unprofessional, but, hey, it’s the 21st century – that isn’t the case anymore! With the advancement in smartphone technology, creating professional product images with your high-quality smartphone’s camera is now absolutely feasible.
Practical benefits: Apart from being budget-friendly, this option offers convenience and portability, while not sacrificing on the quality of your images. The compact design of smartphones allows us to carry them wherever we go: they are light, flat and fit in any pocket. There are therefore hardly any limits to photography.
Easy sharing on e-commerce sites and social networks: Sharing your images on product sites and on social networks has never been as easy as it is today. With this option, your target customers, friends, relatives, and acquaintances can always stay in the picture.
Creativity: The range of versatile apps for editing your own pictures seems to be endless. These are usually available for free or for very little money. This not only enables the user to work with the classic image processing from their smartphone, but also filters the unwanted elements from your product images.
Cost factor: If it should not be just the iPhone of the latest generation, then good smartphones are already available from about $200. Conversely, you have to put a considerable amount of money on the table for a passable compact camera.
Image quality: The quality of smartphone-captured photos has its pros and cons. For example, where the resolution is absolutely sufficient for most purposes, it fails because of printing in large format. So the photographer should think carefully about the purpose of his pictures and in some cases, he should prefer to use his conventional camera. In addition, digital offers more extensive options.
Digital zoom and megapixels: Since most devices are equipped with digital zoom only, zooming in on the image will result in a significant loss of image quality. In other words, the results are very pixelated. In addition, most smartphones are not yet equipped with enough megapixels. Here, digital cameras are still in the lead.
Macro Photography: Similar to close-ups, smartphone photographs are not yet possible in the sense of macro photography. It would be useful to find out where the focus range of your device begins.
Tips for taking quality photography with a smartphone
Are you fully familiar with the functions of your camera app? If not, familiarize yourself with them, because the standard features can be quite substantial: In addition to the self-timer and filter menu, most applications have automatic face detection, various image formats, video, and slow motion, HDR and more. Just play around for a while – you’ll be surprised what your smartphone camera can do!
Determine the focus itself
This gives you control over the different levels of sharpness and image composition. Simply set the automatic focusing of your smartphone. If you now touch a certain point in your picture, the camera will focus on the desired area of the picture.
Actively design the screen layout
First, think about what you want to photograph and look around before you hit the trigger. Ask yourself the following questions: What else is happening in the environment of my desired subject? Is the sun shining or are there great clouds in the sky? Is there a way to give my object a new perspective?
Are there recurring lines? Where is the sun? Are there interesting shadows? Shadowplay is a great way to get very interesting pictures.
Contouring is a central theme for image composition. Are there lines that lead into an image? Are there symmetries and repeating patterns? Are there several image layers that add depth to the image?
Include these things in your picture, because that creates tension and makes a really good picture more interesting!
Play around, what does your subject look like when you shoot it from the top, bottom, left or right? Squat, stand on a chair and give your subject a little room.
Ensure the right exposure
Do not rely on the automatic exposure correction of your smartphone, but rather ensure the correct white balance. Simply tap another point on the display of your device. If this does not work, you must deactivate the automatic setting in the settings. By the way: if you are already there, you can also switch off the flash directly. Lightning often causes hopeless overexposure – so use it only when you really need it.
Use the High Dynamic Range (HDR)
The High Dynamic Range, also known as HDR, is responsible for contrasting your images. A feature that is likely to be on any modern smartphone and it turns out to be very useful. Thus, particularly large brightness differences are reproduced in an extremely detailed manner.
All modern smartphones have an HDR function, but many people are still unaware of how useful it is. The HDR mode takes three pictures at different exposures and highlights the best parts of each photo. Your phone will then do all the work for you: it will create a standard and an HDR photo. The result should be more like what the eyes see than what the camera sees.
Use touch-up apps for more creativity
You will not get a perfect rendering of all your photos so feel free to take advantage of the various mobile phone photo editing applications. Instagram, Photo, Candy Cam & Co.: take advantage of the power of your App Store. Get creative with filters and beautify your product images.
Practical accessories for smartphone photography
As already mentioned, real macro shots are not possible with the smartphone itself. It looks the same with the wide angle and the fisheye. However, if you do not want to do without these options, various manufacturers now have practical slip-on lenses available for them.
Sometimes the image stabilizer helps
With an image stabilizer, your image may appear less blurry. However, with some cameras, the image stabilizer is just an electronic trick that does not bring that much. In addition, you may not be able to adjust an electronic stabilizer if you previously set certain other settings in the camera control. Some Nokia phones, on the other hand, have a built-in optical stabilizer – like large cameras or interchangeable lenses. Then your shots will appear less shaky at long shutter speeds (even videos are better with image stabilizer).
Clean up your lens
Before you even take photos with your smartphone, wipe your lens. Dust and dirt deposited on it will give a grainy result to your product photos.
Choose high resolution
The higher the resolution of your photograph, the higher the quality will turn out to be. Precision will bring your smartphone photos a much more professional result. However, you should note that the bigger your files are, the more difficult they are to store.
Familiarize yourself with the software
You will probably be surprised to discover everything you can do with the camera of your smartphone. All the best smartphone cameras usually have the panorama, HDR, and bokeh features, as well as basics like video, flash, and auto mode. Knowing where these options are will allow you to not waste time searching your settings and not miss out on something.
Do not move while shooting
It is important to follow the same basic rules of digital camera photography when using the camera on your smartphone. Thus, it is imperative not to move in order to take the best shot. You can put your phone on a rigid object such as a tree or wall to create an improvised tripod.
Trim, do not zoom
Zooming on the camera on your smartphone will decrease the quality of your images. The best smartphone cameras often have a resolution of 8 megapixels or more, which means that you can trim greatly while maintaining excellent photo quality.
How to take quality photos considering the weather
Smartphone photos are better when taken in the sun but smartphone lenses and sensors are not yet as powerful as the full-blown traditional cameras.
Here are our tips for taking pictures when the weather is nice:
Avoid very harsh contrasts such as deep shadows and bright skies in a single image.
The sun should not shine directly into the cell phone lens – this disfigures cell phone pictures significantly.
In-Camera Control, test different settings for natural or vivid colors such as landscape, portrait, or white balance for different light sources.
Capture objects that look good with the wide-angle lens of a camera phone, such as expansive landscapes or cityscapes. A bird on the power pole always seems too small in the phone photo.
5 best smartphones for photography 2019
Within the past few years, smartphones have continued to evolve – so have the accompanying cameras. Thanks to competition between the big tech companies such as Apple Inc., Samsung, Nokia, HTC, etc, the camera quality in smartphones (especially flagship devices) has been a major selling point for these big brands.
Behold the smartphone products we regard as the best for taking product photography:
Huawei Mate10 Pro
Camera Features
12 megapixels
Dual cameras
20 megapixels black & white
Optical Image Stabilization (OIS)
27mm equivalent
f/1.6 lenses
4K video
MicroSD slot
Raw
Google Pixels 2 XL
Camera Features
12 megapixels
4um pixels
f/1.8 camera lens
Dual-pixel autofocus
Optical Image Stabilizer (OIS)
HDR+ shooting
Dual L.E.D. flash
4K video
Full HD
Dust and water resistant
Galaxy S9+
Camera Features
12 megapixels
f/1.5-2.4 lens and telephoto lens
Optical Image Stabilizer
26mm equivalent
MicroSD slot
Galaxy S8
Camera Features
12 megapixels
f/1.7 lens
Optical Image Stabilization (OIS)
26mm equivalent
MicroSD slot
HTC U11
Camera Features
12 megapixels
f/1.7 lens
Optical Image Stabilization (OIS)
26mm equivalent
MicroSD slot
4K video
Raw
Last line
When you consider the tips and recommendations given above, taking product photographs for e-commerce should not remain exclusive to DSLRs anymore as there are now smartphones with high-quality camera features which can do the job. When buying smartphones for product photography, watch out for camera specifications such as the optical image stabilization, the megapixels, the lens, MicroSD option and the resolution, which you can combine well with photo software that will be quite helpful while creating your product photos. With these, you should never see a reason for owning a digital camera. Profession photo creation should be just a pocket away!
We agree when you say a photo is worth a thousand words but truth be told; it’s worth much more because a photo can tell all that words could tell and even much more. If what you’re interested in…
Clippingpathasia.com recognizes that photos are indeed an immortalized version of different moments of our lives handed to us in a piece of paper or a graphic file. However, no matter how…
That makes the image more focused on the desired element and so demonstrating the meaning of the picture more appropriately. Make Background Transparent…..
While a first editor would merely detach the canvas as well as replace it, a specialist could do one thing further. He could use associate degree alteration layer or else…..
Just like several another area of life, the growth of technology and newest trends in the globe of photography has altered from physical to digital. In the precedent, diverse apparatuses were…..
✔ Adobe Photoshop image manipulation servicesLighting specialist, manipulate shadow to strengthen the cars lines as well as enhance its curve. The whole sight is melodic group to create the final word insight of the car. But, once the snap shoot….
At times several courses are created to disguise the unwanted portions of a picture. Diverse courses are laid out for each the picture in addition to the sketch for graphic……
Mainly the produce companies for their advertising purpose use these services. ad is one of the most significant aspects throughout which advertising and sales industry grow further….
The memories of high-quality old days are still bright in my mind, while photographs had not anything to perform with the computer. Now, photographs are captured with digital cameras…
All you require to try as well as do is create a substitute path by persecution the pen tool to specify the popular object. Albeit, it is straight forward to execute this method, though, it’s prudent…..